In permaculture, a guild refers to a carefully designed and interconnected group of plants, animals, fungi, and other elements that work together synergistically in a sustainable and productive ecosystem. The main principle behind guild design is creating a diverse and resilient system, where each element performs multiple functions and supports the overall productivity of the ecosystem.
A permaculture guild typically consists of several key components:
Central Species: At the core of a guild, there is usually a main plant or tree species that serves as the focal point or primary provider of resources. This central species is often a long-lived perennial (for example a tree) that forms the backbone of the guild.
Companion Plants: Surrounding the central species are a variety of complementary plants, known as companion plants. These plants are carefully selected to fulfill specific functions that support the overall health and productivity of the guild. They may provide additional resources such as nitrogen fixation, pest control, pollination, nutrient accumulation, or shade regulation.
Beneficial insects and animals: Guilds incorporate beneficial insects and animals that play important roles in pest management, pollination, soil aeration, or nutrient cycling. For example, certain plants may attract predatory insects that control pest populations, while flowers can attract pollinators like bees and butterflies.
Soil Enhancers: Guilds often include plants or organisms that contribute to soil fertility and health. Nitrogen-fixing plants, such as legumes, convert atmospheric nitrogen into a form that other plants can utilize. Dynamic accumulators, like comfrey or yarrow, draw nutrients from deeper soil layers and make them available to shallower-rooted plants when their leaves decompose.
Mulch and / or Ground Covers: Ground covers and mulch plants are employed to protect the soil from erosion, conserve moisture, suppress weeds, and provide organic matter as they decompose. These plants, such as low-growing herbs or spreading perennials, also serve as living mulch, creating microclimates and optimizing resource utilization within the guild.
By carefully selecting and arranging plant species and other components based on their functional relationships, we aim to create self-sustaining and low-maintenance systems that mimic the balance and efficiency of natural ecosystems. The exact composition of a guild will depend on the specific goals, climate, and local conditions of a particular site.
Guild around a young olive tree with various perennial herbs and some annual fruit and vegetable plants
When it comes to guilds with olive trees, there are several companion plants that can be beneficial in enhancing the overall health and productivity of the olive tree ecosystem.
Here are the companion plants we chose for our olive tree:
Other good companion plants for an olive tree guild could be: Borage (Borago officinalis), Fennel (Foeniculum vulgare), Marigold (Tagetes spp.), Nasturtium (Tropaeolum spp.).
I. Comfrey (Symphytum spp.):
Comfrey is an accumulator plant and known for its deep taproots that can mine nutrients from deep in the soil. It accumulates minerals and makes them available to other plants, making it an excellent choice for almost any type of guild. Its huge leaves create lots of shade and help suppress unwanted weeds.
Note: We have placed the comfrey in the shade of the olive tree (north side) as it still is difficult to grow comfrey in our climate. Comfrey generally prefers half-shade and cooler temperatures. With a thick woodchip mulch layer, which is reducing surface temperature considerably, we hope that the comfrey will thrive here.
II. Lavender (Lavandula spp.):
Lavender attracts pollinators and beneficial insects while repelling pests. Its aromatic foliage can also help deter pests from olive trees.
III. Thyme (Thymus spp.):
Thyme is a low-growing herb that can act as a living mulch around the base of olive trees, suppressing weeds and conserving moisture. It also attracts pollinators and repels certain pests.
IV. Rosemary (Rosmarinus officinalis):
Rosemary is a hardy herb that can thrive in the same conditions as olive trees. It attracts bees and other beneficial insects while providing some shade to the soil around the tree.
V. Ballota (Ballota acetabulosa):
The flowers of this herbaceous plant are attractive for bees and when big enough, the leaves will work as a ground cover.
VI. Incense (Plectranthus madagascariensis):
Incense attracts insects, pollinators and butterflies and therefore also birds to the garden. The leaves and branches of thisspecies give off a strong scent and are sometimes used to ward off flies. We’re hoping to keep away the nasty flies that puncture the olives!
VII. Sugar melon (Cucumis melo):
This melon is an experiment – we are very curious as to how well annual vegetables can do around an olive tree. So far, the plant looks quite happy, growing a first little melon.
With its beautiful flowers, this melon will attract pollinators and create shade / ground cover with its big leaves
Remember to consider the specific growing conditions, climate, and region when selecting companion plants for your guild. It’s also beneficial to choose plants that have similar water and sunlight requirements to ensure they thrive together.
Compost production is at the heart of our regenerative practices and having a proper space to produce it seemed an important milestone in our journey.
It all started from the wish to professionalize our compost production. At the beginning, we were making our compost outside, having to protect our piles from sun, wind, and rain.
Hot compost production outdoors
A fully covered area would give us the benefit of working in the shade and protect our fresh piles and the finished product from too much heat, wind or humidity. All of which contributes to a better product in the end: a rich, dark compost, that is full with microbial life.
It all starts with a rough sketch…
So, the task at hand was to construct a spacious, covered area that would allow us to have more control over the entire process while making our lives a bit easier at the same time.
We always try to design our systems with a permaculture approach – each element performs many functions. Thus, the new building should not only help us to produce compost, protect us and the compost from the elements but should also integrate in the existing systems. That’s why the “relative location” of each element is crucial.
By placing it right next to (and one terrace level up from) the main garden, we can choose to gravity-feed our veggie garden by connecting the liquid compost tank to the irrigation system. This way, we save ourselves a lot of time and effort. Future plans involve adding animal stables right next to the compost area, which is another example of a “relative location“. The need for fresh manure in our compost production makes the placement of animal stables right next to it a smart choice.
The building process
After having found the right location, we started out with a rough sketch, some measuring, and the help of many volunteers. We had to select the right logs for the pillars, shave the bark off of them and bury them 1m deep in the compacted clay soil.
First task completed: Coco and Chris are celebrating the accomplished burying and aligning of the pillars
Now that the pillars were in place, we started to connect them with horizontal crossbeams. On top of these connectors, we had to fix other logs using simple joinery. Even though it was basic woodworking, the irregularity of roundwood has got its challenges. Nevertheless, we were determined to spend as little money as possible (as opposed to buying more processed – meaning square – pillars and beams) and we simply love the “rinky-dinky”-style of building with roundwood.
As soon as the main structure was up, we could cover the roof. We decided on rough boards from locally sourced Douglas firs.
To protect the roof from rain, we used overlapping rows of tar paper. We heated the tar paper at the edge where the rows overlap in order to glue them together properly.
Finally, it was time to take care of the work area itself. After some debating whether to use cement or not, we’ve decided to pour a cement floor for half of the building.
We wanted a flat and clean workspace for storing the finished compost and more importantly, placing the brewing tank for our liquid compost production.
We boarded up the walls on the two “wheater sides”, to protect from winds and precipitation from north and west. Leaving enough space on top of every wall would grant us enough natural light and also lessen the wind pressure on the structure.
All we had to do now was installing water and power lines and build a wooden platform to carry our 600lt tank. We’ve also included a ladder and service platform on top of it to be able to easily access and clean the residues inside the tank after each brewing process.
We’ve already used it many times and it works perfectly! The elevated platform provides some altitude to empty the tank without any pump or power, simply using gravity.
Mario and Flo are filling the containers with freshly brewed compost extractThe finished composting area
In the future, we’re planning to install a wind turbine and batteries to hopefully generate enough electricity for the air pumps, which are needed to produce a high-quality liquid compost (tea & extracts).
Another future project is to harvest the rain water from the roof to further minimize the environmental impact in our compost production.
Surely, we’ll be looking for the best possible “relative location” of the rainwater catchment system to ensure that it’ll be also adhering to the permaculture principle of “each element performs many functions”.
For now, we’re super thrilled to be able to work efficiently and produce one of our main assets, a dark, rich, microbially active compost in larger quantities.
In the following article, we’ll walk you through the building process for our eco-friendly campsite. We have completed two super comfy and easy-to-service compost toilets aka “the temple of poo”, two “yin-yang” shaped outdoor showers, a spacious washing station, and a social “chill-out space”. It is eco-friendly because every drop of water is being put back into the cycle and re-used. It all turned out quite as we envisioned it and – even after a year – we’re still very happy with the outcome.
When we decided to organize the “natural building workshop” in September 2020 we knew that we had a few weeks of hard work ahead of us to build a comfortable camping area to accommodate the needs of 12-15 students. It was quite a challenge, having to build all that within the hot month of August!
And we had to start from scratch: There were only olive trees, a small meadow, and a ruin.
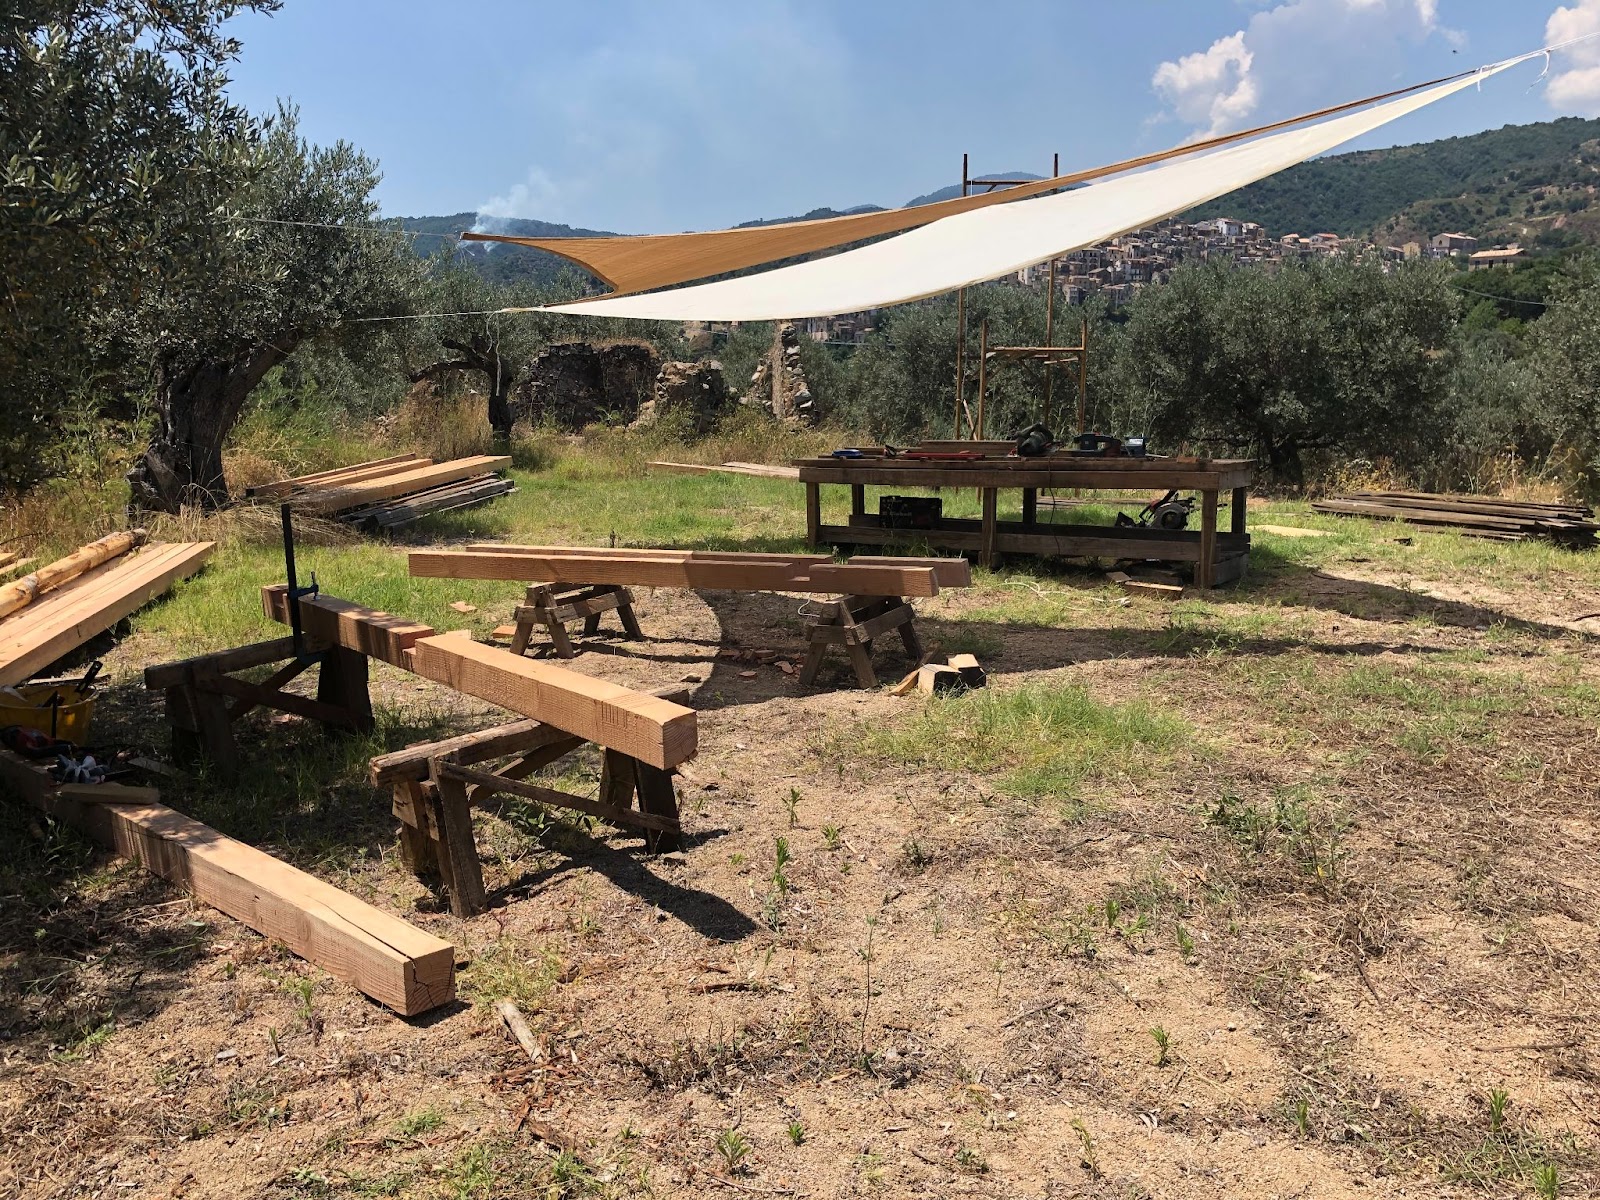
But with the help of our volunteers, especially René, Markus, and Nina, we started to transform the area quickly into something else. First, we installed a small outdoor carpentry from where we’d build all the components for the dry toilets, the showers, and the washing station.
View of our temporary working station on the small meadow.
Compost toilets aka “Temple of Poo”
Our first priority for the compost toilets was durability and comfort. We wanted to create a structure that would last over time and could comfortably accommodate two people at the same time (in different compartments, of course 🙂 ).
Also, it should be easy to service and clean in an efficient manner.
The location we chose for the compost toilet would have to contribute to this latest aspect. We found a perfect spot that was close enough to the tent space and offered two different altitude levels.
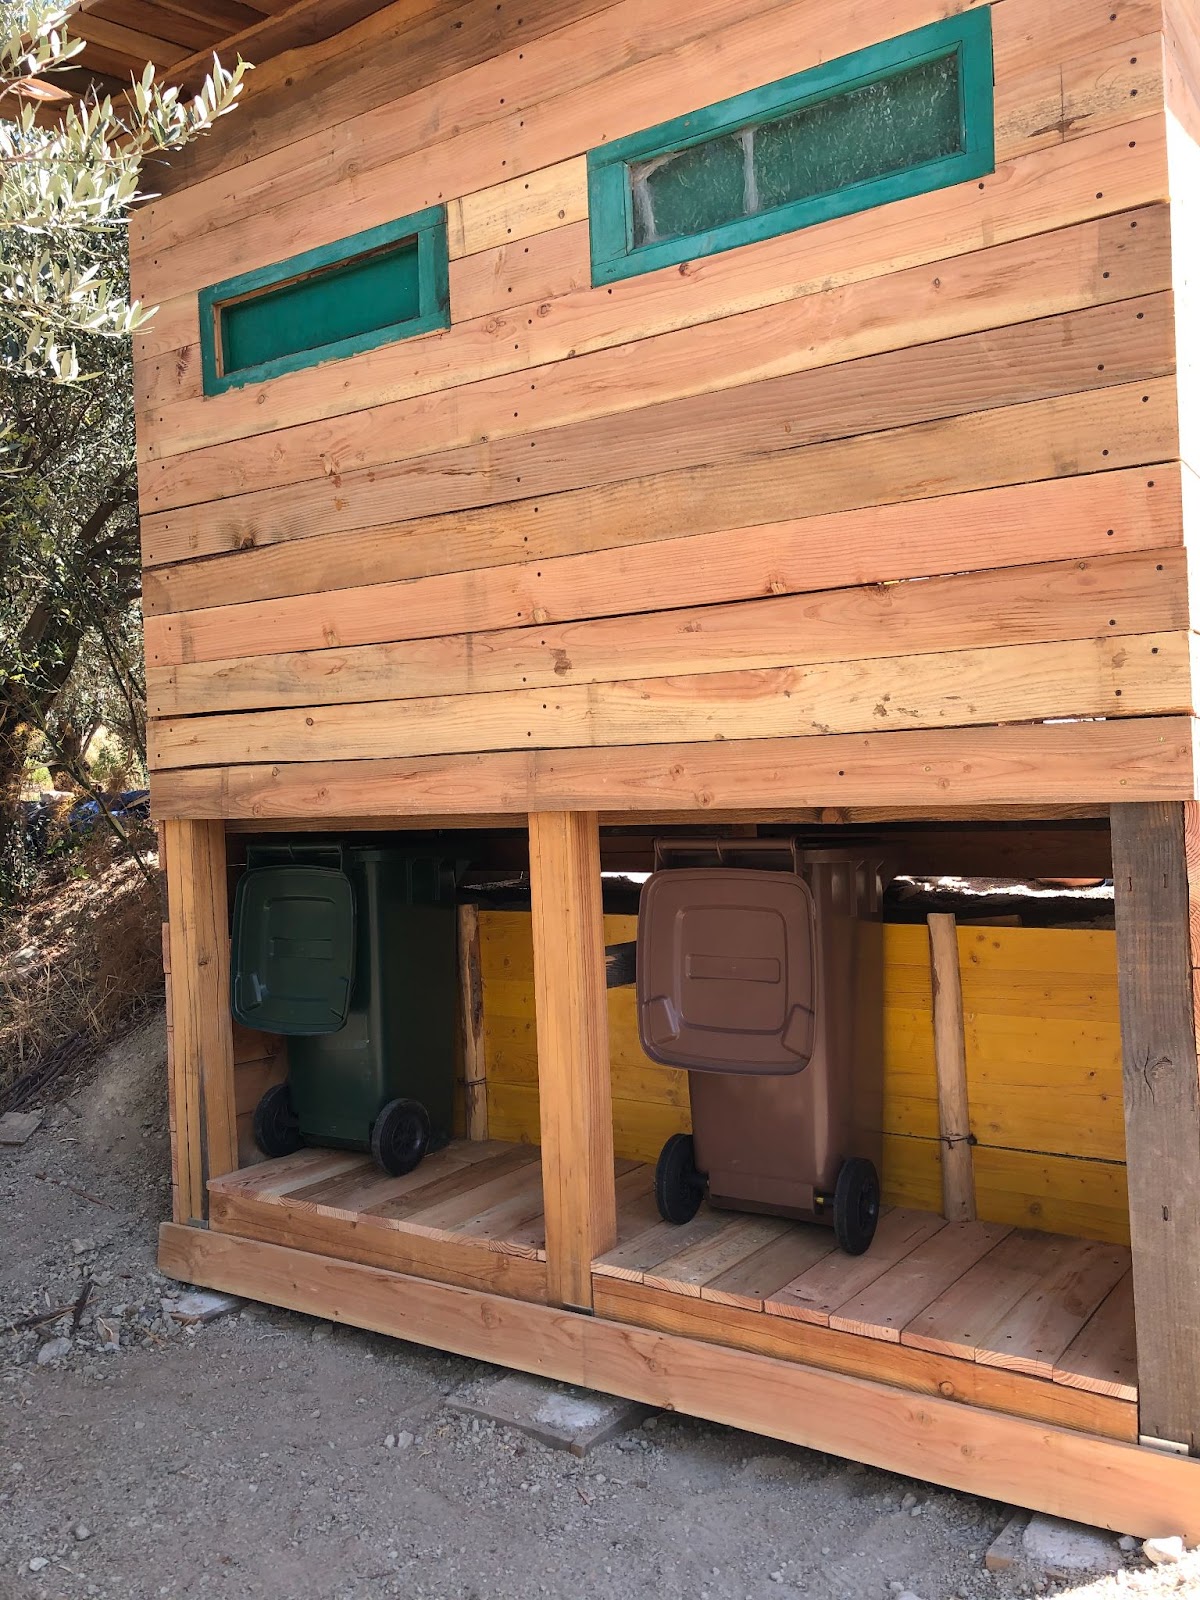
The reason for building the structure across two levels is that on the upper level you’ll have convenient access to the toilet spaces while on the lower level you’ll get easy access to the maintenance area with all the bins and containers. This way, comfortable usage is guaranteed for both the visitors of the toilets and the maintenance crew (us 🙂 ) to do the weekly cleaning routine.
In this image, we can see the two levels under construction. The bottom part is the space for the bins and containers. The upper part holds the two toilets and entrance.
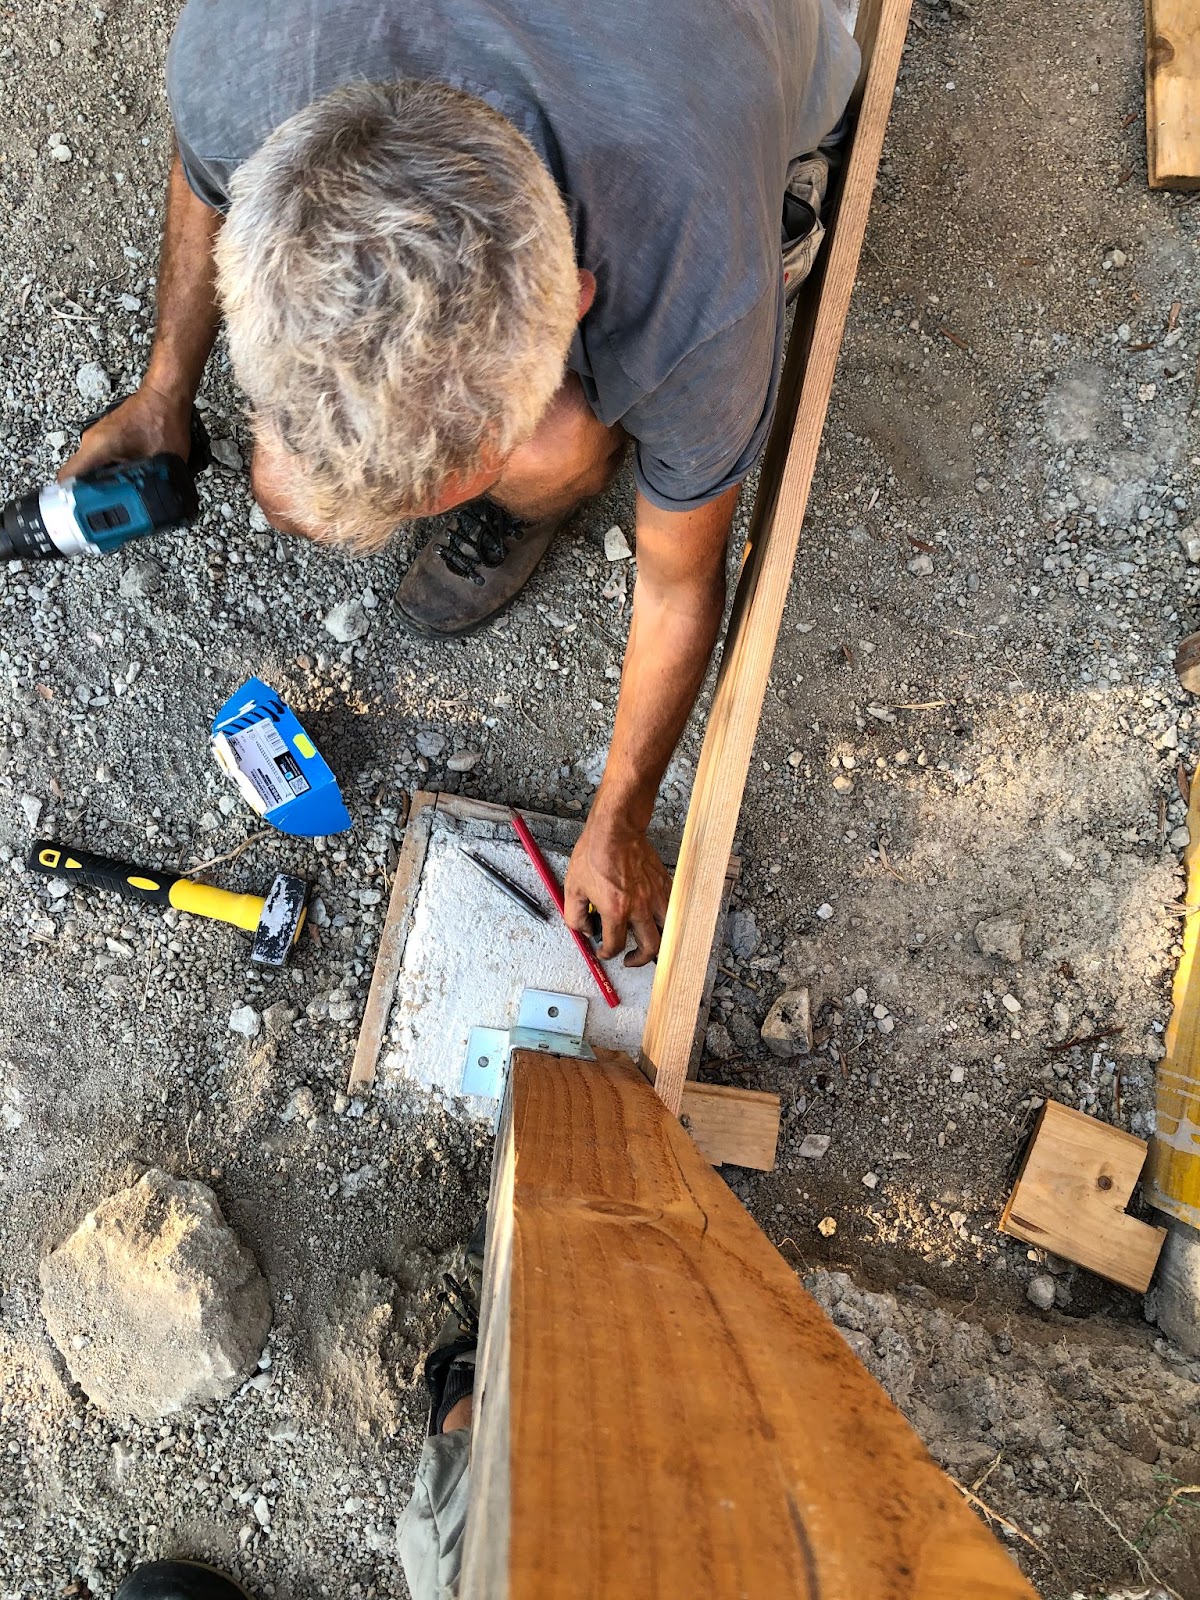
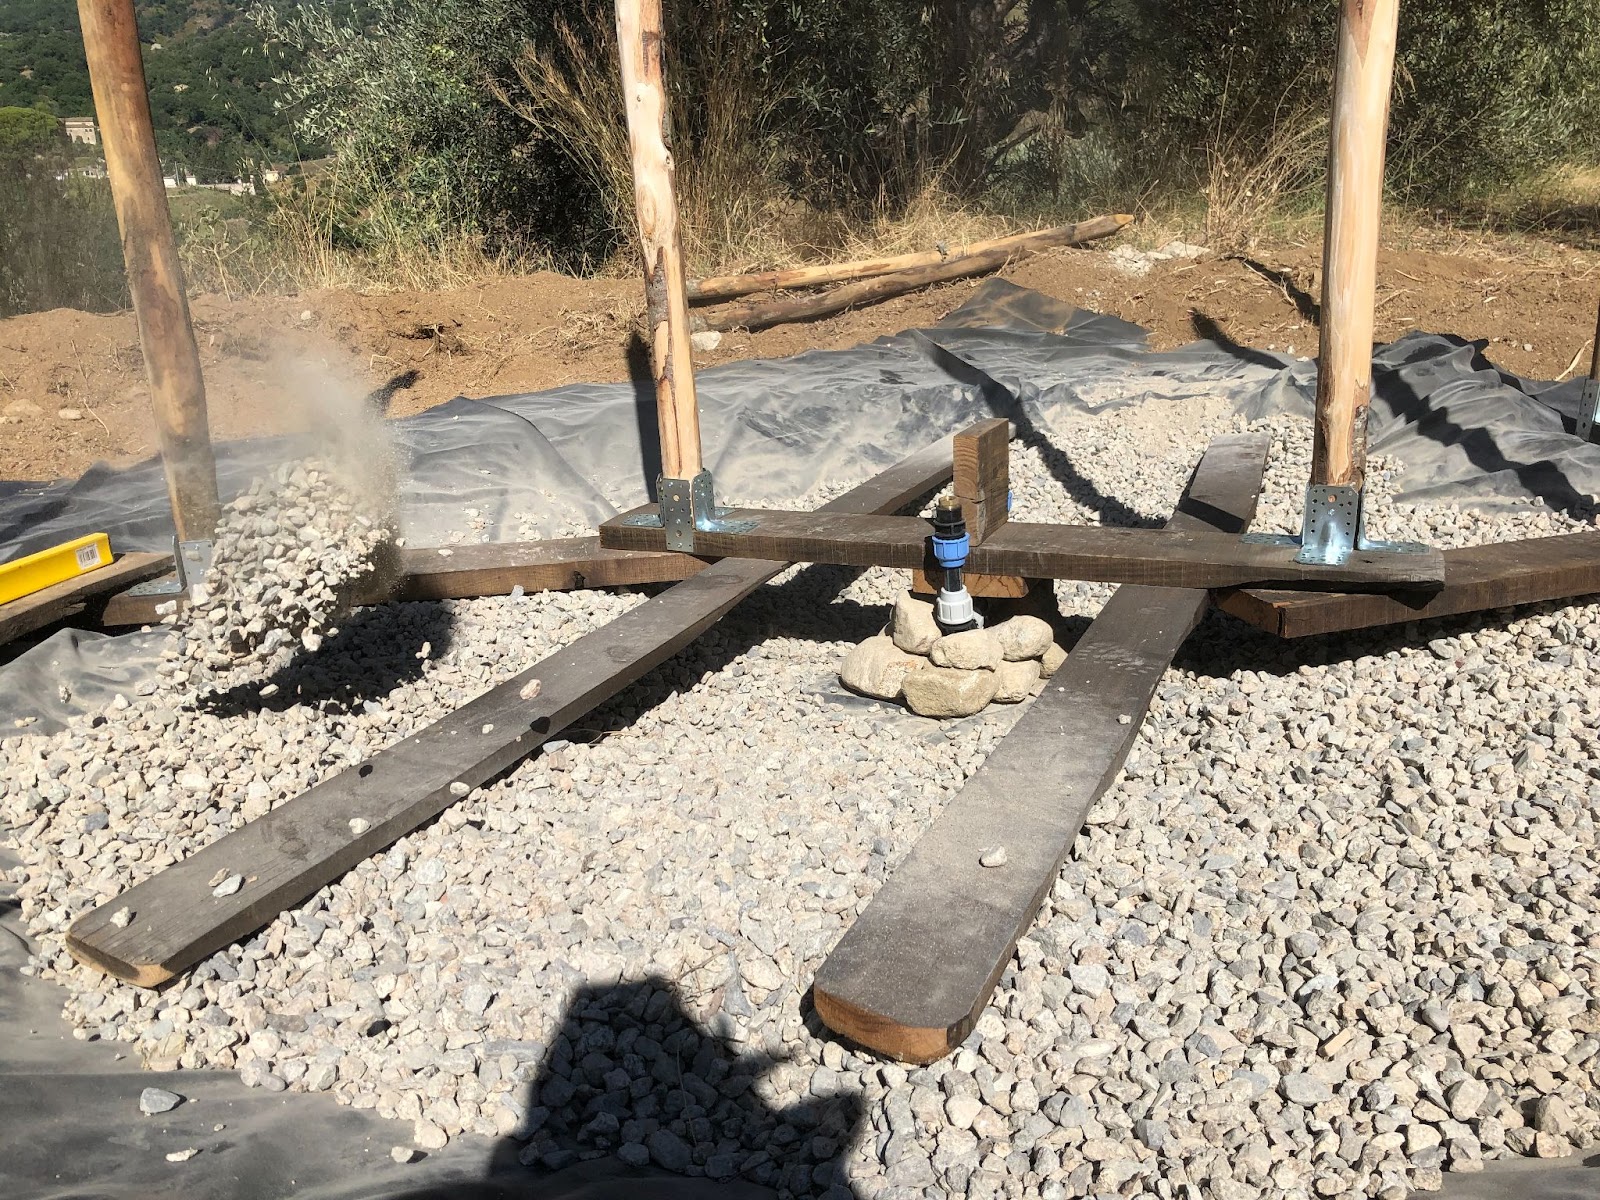
As soon as the site was chosen, we started with the foundations for the main pillars. In this case, we used a cement / gravel mix mainly because our focus was on durability and also because there is a high risk of erosion around a terraced ground that consists mainly of sandy soil.
Chris fixing the wooden pillars on the concrete foundation.
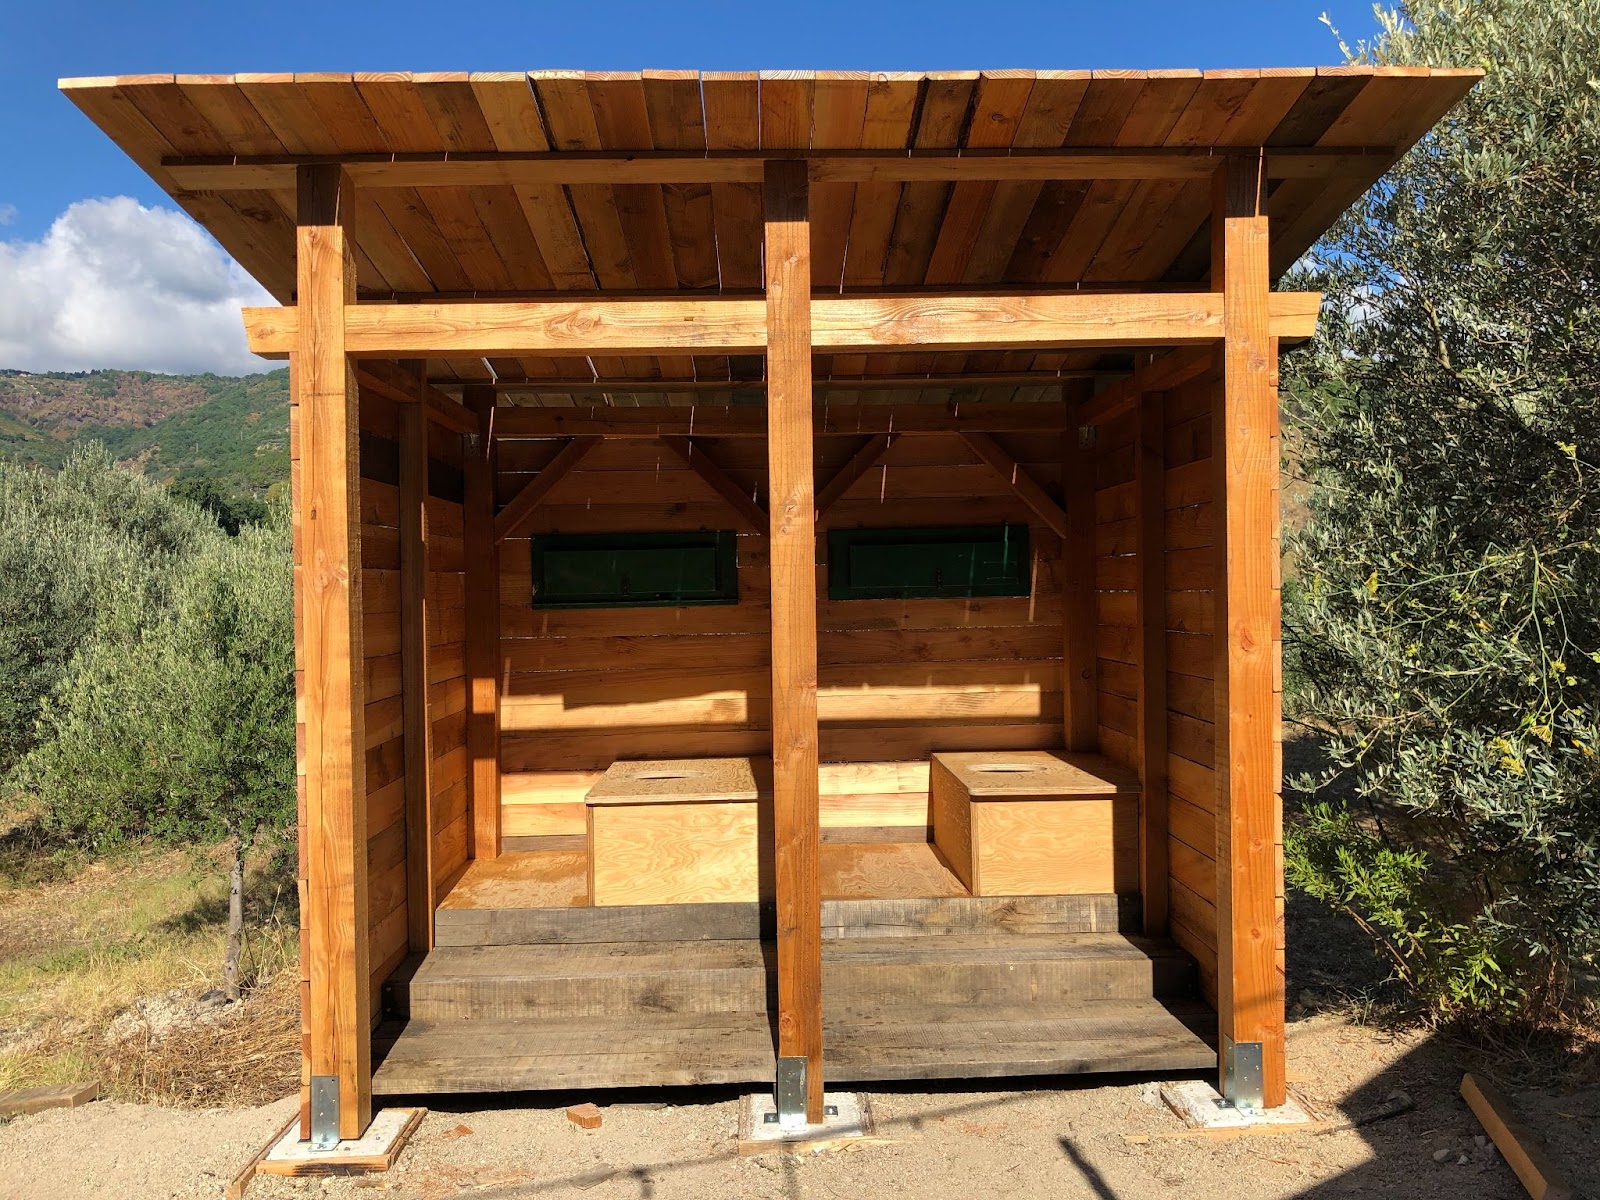
After the foundations had dried, we started constructing the wooden structure and raised the nine main pillars.
View of the main structure set on 9 point foundations. The two wooden steps leading up to the toilets from ground level are already in place.
First “test-drive” of the sitting platform 🙂
View of the wooden structure with the first separating wall.
Frontal view of the two cabins with lateral walls finished.
We recycled 2 old green windows. They grant a beautiful view of the village and bring personality to the building.
Mario helping with calculating the roof angle.
Cutting the pieces for making a super comfy toilet seat.
Frontal view of the building without the roof.
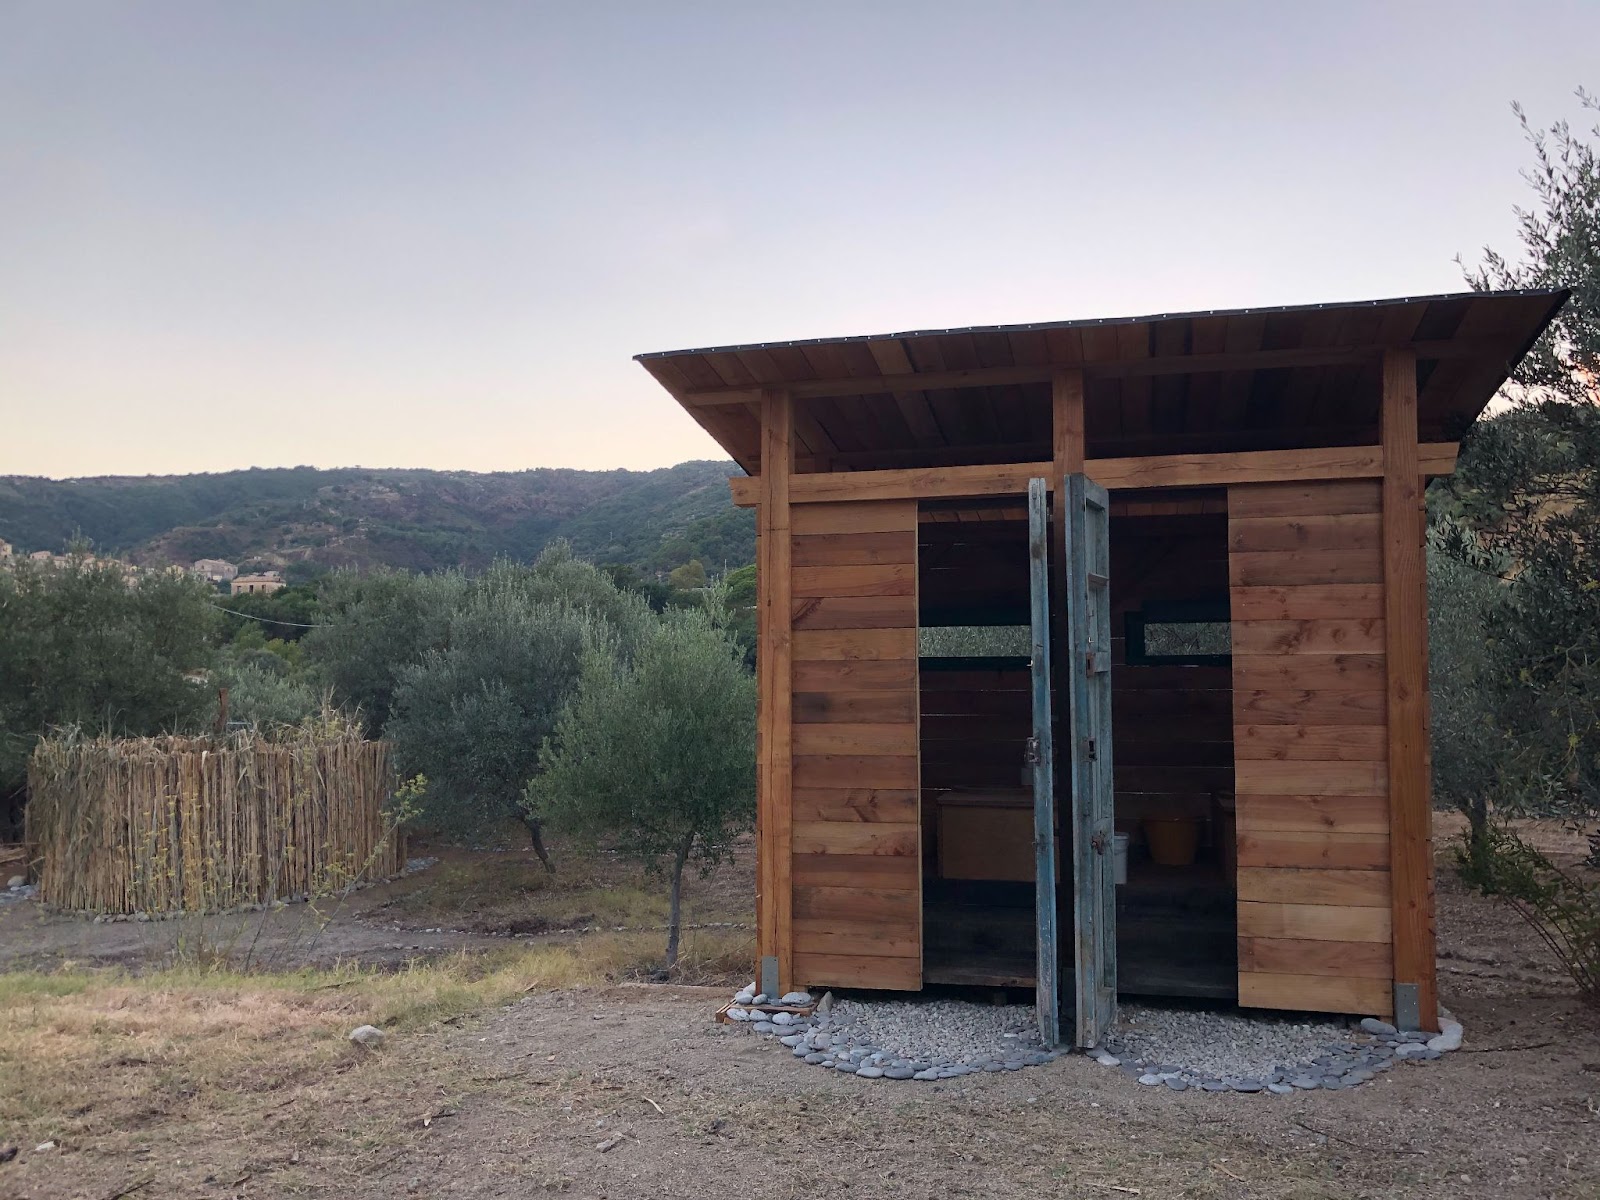
Chris using the chainsaw to cut the roof support at the right angle.A proper tool for each task will save a lot of time.Frontal view of the building with the roof.
View of the back with the two green windows at the top and the “maintenance area” at the bottom. The urine containers are still missing.
Luckily, we were able to reclaim both doors and windows from a derelict house which are giving the building a unique touch. In the end, we oiled the whole wooden structure (Douglas fir) with linseed oil to protect it better from rain.
One of the main reasons why the compost toilet works so well without generating unpleasant odours was the separation of liquids and solids in the toilet. A urine separator ensures that the faeces do not get the excess moisture and can therefore dry quickly without generating unpleasant odours. Another huge plus is that we can safely compost the precious “humanure” (feces) and use the urine diluted with water as a high-nitrogen liquid fertilizer for our olive trees.
For its size, lasting materials, and efficiency we decided to call it The Temple of Poo 🙂
Yin & Yang Showers
One of our first ideas was to build two intertwined outdoor showers in the shape of a drop or the Yin and Yang symbol (which can only be seen from a bird’s perspective).
However, we soon realised that some modifications had to be made to the original shape to make it functional and to be able to enter and leave the “maze”.
Following the permaculture principle, “Each element performs many functions” (at least three), we had set our minds to a solution that would allow us to reuse the greywater from the showers and circulate it through our land as long as possible. From a permaculture perspective, the showers are not only cleaning our guests, they also inspire us with their beauty and most importantly, they’re also helping us to irrigate our citrus trees.
We knew that this would require some sort of cleaning process before we could use it for irrigation. Read on and discover the step-by-step process of constructing the showers and the reed bed to filter the water until the moment when we finally could wash the sweat and dust off of our happy faces when the showers were finished.
It all started with a hole of about 4m in diameter.
René helped us in making the hole. We can see the mix of sandy and clay soil found in that spot.View of the future shower area.
In the middle of the two showers, we installed a drainage system and a pipe that would transport the greywater towards the reed bed.
René covers the pipe which connects the showers with the reed bed.The wooden boards were used as an independent base for the walls.
We laid out a 4x4m pond liner (black waterproof plastic) to collect all the water from the two showers. Then we topped it up with gravel until the ground level was reached.
View of the hole covered with the pond liner.
We added gravel onto the pond liner.
In the middle you can see the drainage box for collecting the water.
View of the support structure for the poles.The water input pipes can also be seen in the middle.
Once the water collection system was almost done, we proceeded with the installation of posts to support the walls of the showers. Since the pond liner couldn’t be pierced or damaged, we had to construct a stand-alone wooden structure where the walls could be attached to.
After the structure was finished we covered the boards with gravel.
For the shower walls, we chose the local variety of cane, as it grows abundantly in this area and is available freely all year round. Each of the canes was cut to a certain height (around 2m) and a couple of holes were drilled in the ends of the cane.
Then, a wire rope was inserted through the holes to give consistency to the wall and to join cane to cane.
Working station for creating the cane panels.
View of the first meters of wall installed.
We included a line of stones where the canes could be rested upon.
Just one missing panel…!
Once the walls were done, the only thing left to do was to connect the shower heads with the pipes coming from the ground. For usability and comfort, Nina has built a small wooden bench for each of the shower compartments.
Detail of the shower.
Done! For more comfort and beauty we’ve hand-picked some smooth stones from the beachBird’s eye perspective: A slightly opened Yin-Yang shape allowing to access both showers independently.View of the “Temple of Poo” and the showers
Washing station & Laundry
Last but not least, we also needed a place for our guests to wash their clothes, brush their teeth, and, basically, have access to water.
From reclaimed local chestnut wood, Nina built a beautiful wooden table with a double sink. On the extension to the left, we managed to integrate an old washstand that we had found in the trash.
View of the wooden table with the sinks still under construction.
View of the completed washing station with the old concrete washstand.
Of course, we also connected the greywater pipe from the washing station with the reed bed.
We didn’t want to waste a drop of our precious water!
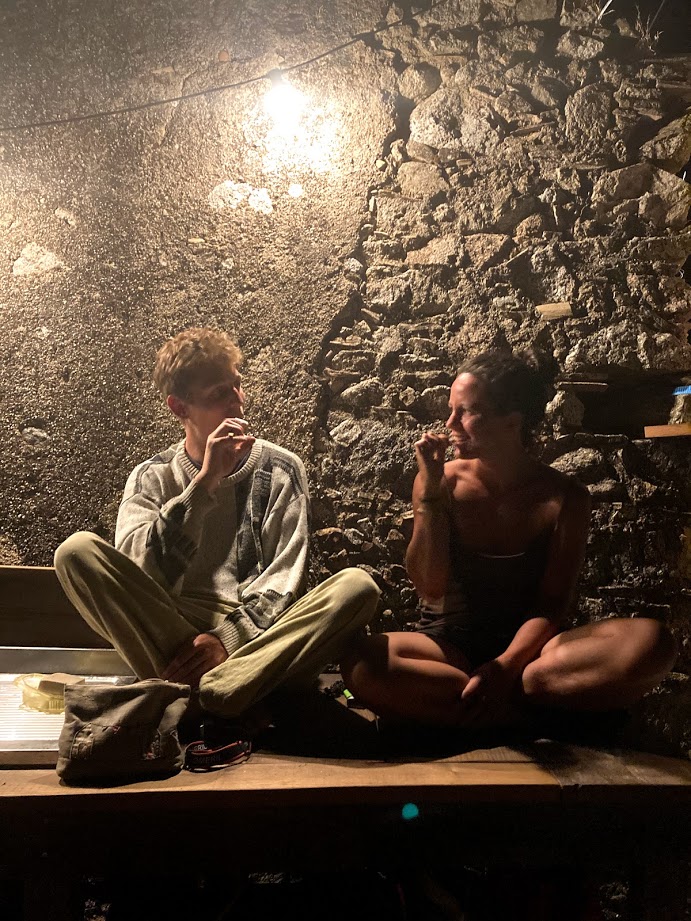
Chill-out area
Creating a space for people to relax and socialise after work was the last of the tasks. We thought that our ruin, a halfway collapsed former farm building, would serve that purpose.
So we started to clean the inside from all the wild vines, brambles and leveled the ground. The half-open walls protect the interior just enough from wind gusts, creating a nice comfy space which we’ve completed by adding a couple of tables and wooden benches.
We’ve also included a light chain for late-night sessions and, most importantly, a power socket for the students to charge their devices.
Finally, we included a sun sail to create some shade for the rare occasion of rest during the day.
View of the “chill-out” space inside the ruin
Luckily, everybody was as excited as we were about our new campsite facilities! We didn’t have to wait long before we’ve got some positive comments from our guests.
Among many others, we remember the happy face of a student exiting the showers. He came out with a broad smile from ear to ear saying:
“This shower experience has been amazing, I simply love the natural vibe of it”.
But not only us humans enjoy the benefits of a well-designed campsite. Remember: From a permaculture perspective, each element should have multiple functions. In this case, our trees and gardens also benefit indirectly from these facilities as the faeces and urine, generously produced by our guests, are being used as fertilizers.
In the case of urine, we get a ready-to-use, nitrogen-rich fertilizer (diluted 1:10 with water) while we prefer to let the faeces aka “humanure” decompose for at least a year before we use them as an amendment / organic matter for our trees.
We feel proud of managing our campsite in a sustainable way and hope that all our future guests will be equally happy knowing that the water they use or their “left-behinds” in the compost toilet will eventually be reused and put back in the big cycle of life.
This quote is not only valid today but it is even more relevant when we see the steep decline of drinking water reserves globally or the impact that climate change has on the water cycle, just to mention these two.
Since the beginning of our adventure to become regenerative farmers, we know that one of the key pillars in the project is the use of water resources responsibly.
Therefore, we started the construction of two rainwater cisterns that would serve as storage, distribution, and optimization of water use especially in times of drought. Also, this storage of water is extremely important in the fight against wildfires that are quite common in summer.
Several wild fires on neighbouring lands monitored closely by Natural building students September 2020.
Fighting a small bush fire with shovels and hoes before the fire reaches our land.
Wild fires are common in this area during summer. Most of them are man-made!
We discussed several ways of building the cisterns without finding the “right one” until Diego, one of our volunteers with experience in the construction sector, suggested building them in a round form. This would require us to use metal molds to be able to pour the walls in a circular shape. His confidence and motivation convinced us and that is how we started the construction of the first cistern at the end of May 2020.
The first step was to find a suitable location where to build them. They had to be close enough to the house for maintaining a constant pressure (the pump that connects us to the public supply is too far away – due to that we often used to have pressure problems). An even more important reason for proximity to the house was that we wanted to collect the rainwater from the house roof.
View of the building site at the first stage. To let gravity do the work for us, we’ve constructed a funnel connected to a pipe to pour cement from the upper terrace directly into the form. This has saved us a lot of time and back pain 😉
Taking into account that the average rainfall in Badolato is 905mm / year and that our roof surface equals 110m2, we have the potential to store almost 100m3 of water per year.
We chose the closest olive grove from the house to build the cisterns since it is close enough for laying pipes. At the same time, the cisterns would be hidden amongst the trees and not draw too much attention away from the unique landscape.
From the beginning, Diego suggested excavating the holes by hand as the soil is sandy and not too compacted. Despite a certain skepticism, we accepted, and with the help of other volunteers, we started digging.
We used our homemade broad fork from the garden for digging the first part.
One of the metal molds that were used to give shape to the cistern.
Digging manually and with a jackhammer.
The first centimetres were easy to dig but soon we found coarse sand that was very compacted and we had to use a pneumatic hammer.
A metal ring helped us to keep the same right diameter during digging.
The first cistern is 2m wide and 3m deep, which amounts to 9m3 or 9,000 liters. The second cistern measures 2m x 3.5m which generates a capacity of 11m3 or 11.000 liters.
Digging the second cistern.
Detail of the mold and concrete walls.
To ensure waterproofing capabilities of the cisterns we added a finishing painting layer.
Applying a finishing painting layer to avoid any leaks.
A long ladder was mandatory to reach all parts of the big cistern.
At the beginning of July, the cisterns were ready to be filled and we were able to install the pipe system that connects the roof to one of the cisterns to start harvesting rainwater.
View of the rainwater harvest pipe from inside of one of the cisterns. It makes us think about “2001: A Space Odyssey” movie!
After so many weeks of hard work, we opted to hire an excavator to help us with the trenches for the pipes and also to lift the concrete lids onto the cisterns.
The excavator digging the trenches for us.Installation of one of the lids made of concrete.
Rainwater system connecting the roof to the cisterns.Construction of the lid.
View of the trenches and Badolato borgo.Detail of the cistern lid. Metal ring, mesh and hooks.
Both cisterns have submerged pumps that are independent of each other, which allows us to switch between them easily.
The latest step was to build a small housing for all the pipes, faucets, and control units. The natural place for this was right between the two cisterns.
View of the cisterns and housing for pipes and switchers. The ugly orange pipe (we will hide it, promise!) is the one connected to the roof for harvesting rainwater.
The current set-up gives us full control of the water flow, for example, we could decide to pump all the water from one cistern into the other for cleaning purposes.
These are our happy faces reflected on the full cistern while realizing the importance of having such a reserve of water.
After some months of using the cisterns, we can proudly say that the whole project fulfilled all our hopes and expectations.
The system is running so efficiently that we are totally independent in terms of water use except for the driest season. This means that we don’t need to buy any communal water for about half the year! We are very happy to have successfully added some level of self-sufficiency to our lives and to this project.
We want to thank all the volunteers and people involved in this project, especially Diego and Rob who played a key role in the design and construction process. You rock guys!
View of the cisterns area from the top. We can see one of the manhole open.
This amazing piece of land has provided us with medicinal herbs, fruits, and all sorts of edible plants. Most of them have been planted a long time ago by the previous owner; Teresa Fiorenza, a gentle old lady that probably has lived through hard times during and after World War II. Thank you for that, Teresa!
We are blessed with a variety of perennial plants and trees such as loquat, artichokes, mulberries, dates, peaches, plums, apricots, almonds, figs, pears, apples, kakhi, jujube, pomegranates, walnuts, hazelnuts, lemons, oranges, mandarins, cedro and bergamot. What a treat to eat fresh produce directly from a tree or pick from the land…!
But it doesn’t stop there.
Continuing Teresa’s legacy and following our own path towards being self-sufficient, we started planting a selection of new trees around the house (such as the sub-tropical Moringa Oleifera and Ceratonia siliqua / Carob, some fig and oak).
Young carob sapling
“The best time to plant a tree was 20 years ago. The second best time is now.”
― Chinese Proverb
In the previous orchard, we added two varieties of apricot, two varieties of apple, quince, flat peach (Prunus platycarpa), regular peach, mulberry and plum.
Alongside a cliff in a more shaded spot, we have planted white/red/black currant, red gooseberry, blueberry and raspberry.
In the flatter part of our future food forest, we utilize swales, a landform in the shape of a trench and berm running along contour (points of the same altitude) to catch as much rainwater for the trees and plants as possible. In our case we probably should call them semi-swales, as they’re interrupted and not perfectly along the contour line.
Aerial view of food forest area, showing potential water collection in swales (in blue)
Tree planting
View of the future food forest with freshly dug swales
We dug holes in the “hill” side of the swale, about 40-50cm deep / wide. A large enough hole for the roots to grow bigger before they’ll eventually hit native soil (which is usually more compacted). Each tree will receive more rainwater, as the ditch of the swale will help infiltrate all the surface water into the root zone.
Planting hole
To help these young trees, we added several layers of seasoned compost in between the native soil. The goal with adding our own compost is to inoculate native soils with a most diverse microbiology (beneficial microorganisms and beneficial fungi).
This is the main reason why we have established our Soil Lab. With the help of a microscope we’re able to assess the quality of our own compost and soils, mostly to identify all beneficial or non-beneficial microorganisms that are part of the Soil Food Web.
This way, we’ll simply make better decisions. In the case of planting trees we have utilized a seasoned compost with more fungi than bacteria biomass because trees are lifeforms of a later stage in evolutionary succession. Therefore, trees need nitrogen in the form of ammonium NH4. Fungi are responsible for converting nitrogen into ammonium – that’s why trees prefer fungi dominated soils over bacteria dominated soils.
Adding a rich mix to the planting hole (seasoned compost and topsoil)
Before setting the saplings into their holes, we carefully decompacted the root balls once they were out of their pots to prevent girdling.
Loosening the root ball is important for the development of the roots
What is “girdling”:
When plants grow in nursery containers, their roots hit the wall and begin to grow in a circle. By loosening the root ball and therefore breaking the circling pattern of the roots, the plant will most likely not keep growing circular. We also dug square holes in the hopes that some roots will eventually hit a „corner“ to easier break the threshold between hole and native soil.
Finally, we’ve hammered three fence posts into the ground around each sapling, (making sure not to sever the root ball). Once the summer drought hits this land and the drip irrigation system is on, wild pigs will smell the water immediately (as there is not much water around in summer). They’ll confuse any wet swale for a conveniently prepared pig bath tub and by happily rolling themselves around in it, they might eventually damage or even uproot small trees. Let’s hope this safety measure will protect the saplings from any boar activity!
Creating a “food forest“ or “edible landscape“
What is a food forest?
A food forest, also called a forest garden, is a diverse planting of edible plants that attempts to mimic the ecosystems and patterns found in nature. Food forests are three dimensional designs, with life extending in all directions – up, down, and out. A food forest does not have to be re-planted year after year. Once it is established, it is generally very resilient.
Source: Resurgent Circles – Seeding Eden (modified by us)
Generally, we recognize seven layers of a forest garden – the overstory (canopy layer), the understory (smaller trees), the shrub layer (bushes), the herbaceous layer (grasses, medicinal plants, etc.), the ground cover layer (perennials like clover, etc.), the root layer (root vegetables) and the vine layer (climbers). Some people also like to recognize an eighth layer, the mycelial layer (mushrooms). Using these layers, we can fit more plants in an area without causing failure due to competition.
The food forest area is marked with a red dotted line
A food forest must be organic. Forest gardens depend heavily on a healthy ecosystem and cannot be sprayed with herbicides or pesticides or have non-organic fertilizers applied. A healthy ecosystem will take several years to establish itself, especially in a city or open farm area. We have to be patient and let nature take care of itself (while providing the necessary food, water, and habitat for all the components of the ecosystem, otherwise they won’t come).
Food forests are a new farming concept in our area, but they have been used for thousands of years in other parts of the world.
Adding some seasoned high-fungal compost to an orange tree
A well-designed forest garden has many benefits:
Planting densely and using ground covers to shade soil and suppress weeds is returning more yield on a given surface area.
Utilizing nitrogen-fixing (i.e. leguminosae, etc.) and nutrient-accumulating plants (i.e. comfrey, etc.), “chop-and-drop” techniques, and returning wastes to the land will create healthy soils instead of having to buy and add commercial fertilizers.
Planting a diverse array of plants will attract beneficial insects to pollinate the fruit crops and keep pest populations from exploding and causing damage.
By utilizing several ground-shaping techniques we are able to keep rain water on the site.
Depending on the topography, designing for specific placement of plants helps create windbreaks and micro-climates.
Placing emphasis on trees, shrubs, perennials, and self-seeding annuals, the overall amount of work is greatly reduced.
In his book “Gaia’s Garden”, Toby Hemenway recommends some of the following soil-building plants for orchards/food forests:
Our first big project was the construction of a big veggie garden. With the uncertainties of this new pandemic situation, we figured that it won’t be a mistake to create a slightly bigger garden, just in case we would have to become self-sufficient earlier than we had thought… The capacity of it should be able to feed at least six people or more.
We chose a sunny 500m2 patch that stretches along the steep, forested valley-side down to the river which runs 150 m below. There were just four small olive trees on this terrasse, so we wanted to include them in our garden design as a shade instead of eliminating them. First of all, we had to create a durable fence to keep out the many wild boars that roam these lands. Many people had warned us from these animals that seem to be quite a plague here.
Protection against wild boars
The main reason is that there are no more predators (i.e. wolves) around to keep their numbers at bay. Some locals have another explanation for this phenomenon: The legend goes that some farmer once bound a domestic sow (female pig) and had her impregnated by a wild boar. Later on, part of the offspring apparently managed to escape and therefore combined the original genes with properties from the domesticated mother. While wild boars usually only give birth once a year, these new wild boars (with partly domesticated genes) could now reproduce up to three times a year and get up to twelve young ones at a time! Whatever the case might be, we soon discovered holes in pre-existing fences in other parts of our land. Following the trails that started at these holes we regularly discovered patches that had been upturned by a troop of wild pigs. So far, the damage luckily has been moderate since they didn’t reach the roots of the olive trees. Let’s hope it’ll stay that way! Nevertheless, we were warned..
So we dug a trench, 50 cm deep and 30 cm wide and inserted more than 100 hard-wood poles (chestnut), each of them 1 m apart. The poles were secured by hammering granite stones into the soil around them
We continued by filling the rest of the trench with more granite stones and some rubble that the previous owners had dumped somewhere on the land. After the main fence (150 cm high) was set, we reinforced it with a 1 m high heavy-duty steel-mesh which was buried around 30 cm into the ground.
Our volunteers Angi and Joel completed the job with two nicely crafted gates that would supposedly withstand any attempt by wild boars of ramming it. After some weeks of hard labor we finally could start with the initial task of creating a veggie garden!
Preparing the beds and soil
The existing soil seemed to be pretty compacted, so we decided to loosen it with digging forks. The first layer was dry leaves and/or cardboard to reduce the weed pressure from below as there was nothing more than thick grass and weeds present.
Luckily, we got a few cubic meters of old soil (supposedly fertile) out of a ruin in town, where a huge fig tree has been growing for decades. The beds were then topped off with a 10 cm thick layer of soil mix (we added old chicken manure that we’ve found in a barrel – unfortunately, it was almost decomposed to soil). After putting the soil mix on the beds, we watered them down to moisten the soil and also the cardboard underneath.
The fun begins
Finally, the fun part could start: Planting the beds! Shortly after our arrival to the land, we had eagerly germinated a big variety of seeds, no matter if they were in season or not. We brought a bunch of seeds with us and we didn’t even know if these varieties would tolerate the much hotter climate here in the south.
We planted tomatoes, basil, peppers, pumpkins, zucchini, cucumbers, strawberries, leeks, salads, onions, carrots, broccoli (which was apparently not the right season – they grew like crazy but went straight to seeding stage), beans, beetroots, chard, corn and many other things would follow as soon as we got more beds prepared. Our volunteer Diego built us a nice broad fork to loosen the soil much easier as you operate it with your whole body, not just with your hands. We eagerly mulched all the beds around the seedlings to avoid evaporation and to slow down weed growth. Since May was no season to find fresh straw, we had to take what was left over from the previous year (most of it got rained on), so we must have used some moldy bits in our mulch because some plants really didn’t seem to grow for weeks. Only after we had taken it off or have replaced the straw with other mulch (wood chips that we made with our shredder) the beds suddenly showed some increased activity.
Planting carrot seeds between rows of onion seedlings
Later on, we added more organically shaped beds, like a spiral with a Fibonacci ratio :), two keyhole beds and a „hügelbed“ or „hügelkultur“ in the shape of a gecko. Most of the beds produced a good yield regarding the little input we gave them and for the first season (spring / summer) we are quite happy how everything developed.
Thanks to the amazing cooking skills of Yvonne, we enjoyed countless incredibly yummy vegan meals and dishes. Besides the luxury of having a passionate cook who always fed us well (and therefore kept us happy), the rest of the gang could concentrate on the other tasks at hand. Thanks again, Yvonne, for the love and passion you’ve brought to this place!
We also won’t forget Markus’s skills to create incredibly delicious raw food cakes for us (which would easily match those of a 5-star restaurant!) Thank you, too, Markus. You’re a gifted cake-maker (and also maker of useful things like vermicompost bins and much more)
The small house garden
We also created a small house garden which is running along and underneath a pergola-like structure that is overgrown with wine. We also included the pre-existing lemon tree, a loquat tree, a plum tree and a fig tree inside the fence.
These trees will most likely produce much more fruit in the long run, thanks to the irrigation in the surrounding garden. In return, they will help shade the plants from too much sun. The little wooden bench that Mario and Markus have built invites everyone to enjoy little breaks in the midst of a beautiful variety of plants and flowers.
This little bench invites everyone to enjoy little breaks in the midst of a beautiful variety of plants and flowers. If you want to know more about our adventures you can join our community and receive our regular newsletter.
Processing…
Success! You're on the list.
Whoops! There was an error and we couldn't process your subscription. Please reload the page and try again.
Exciting News!
We've got a brand new website and name for our project.
Check out our updated website at https://terranima.farm/
 Discover fresh content, improved navigation, and a whole
new experience.